Home Link

Saturday, January 7, 2012

Origami March of the Penguins

Hello Bloggers!  Today I want to share with you a find from the internet.  My students and I began our Polar Region study last week.  The preschool at my school often does a penguin unit at the same time as our Polar Region unit.  My first graders really liked making the origami bats we made in October, so I thought it would be fun if we made something to inspire the preschoolers during their penguin study.  I found a great video of Michael LaFosse teaching penguin "storygami".  Michael tells a clever story of three penguin friends as he folds paper making the penguin.  The story is a great way to remember what the next step is in the folding process.  I loved it!  Please find the link below.

I told the story to my first graders while folding the penguin and they were so excited to try it.  We decided to make an origami penguin mobile for the preschoolers.  It was fun to hear them repeat the story parts as we folded our penguins.  They were very proud of their work.  I found a wire hanger (don't tell Joan Crawford) and did my best to shape it in a spiral.  Then I pulled out my old glue gun and glued string to the penguins.  One dollop of glue on the hanger held the penguins to the "mobile".  When it was done it looked like penguins marching in a line - do you remember that scene from March of the Penguins?  My little first graders were so excited to present it to our preschool teacher.  They even asked it we could put it in our gift box.  The preschool teacher loved it!  She was really impressed with their work, even though she is not teaching a penguin unit this year.   Ah well, good intentions!  Here are some pictures of the mobile. 


We used black/white and gray/white paper for our penguins, but you could use some fun colors to make festive penguins! 
Hope you are doing something fun this weekend!


Sunday, January 1, 2012

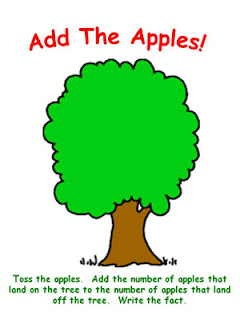
Add the Apples!

My Dollar Tree betrayal went beyond my last post. While I was there I found some great erasers. I usually start the school year with a brief apple unit.  I put together this little math game that I will use next September.  I thought I should post it now, because I will never remember to post it next fall!  


Adorable and just $1.00!  I put together a quick apple tree mat with some free clip art. 


                  Click here to download the apple tree mat!

Students will "roll" the apple erasers on the mat and add the apples that landed on the tree to the apples that landed off the tree.  Quick and easy!  I'm working on a few more posts that I hope to have up in a few days.  Enjoy the last few hours of our break!


Have A Heart Valentine Math Station

Happy New Year!  Can you believe the holidays are over?  Well, almost- we always have Valentine's Day!  Here is a little math station to work on addition and subtraction facts.  I was perusing the dollar section of Target -don't tell Dollar Tree about this little indiscretion, I swear it was the first time!  I found some festive little ice trays, adorable hearts and plastic heart containers. 


You can hear it, can't you?  It's practically jumping off the screen saying, "Here I am!  Turn me into a math game!"  That's pretty much what I heard in Target.  First, I added numbers to the ice cube trays (2 for $2.50).


I took some of the small hearts and put them in the larger heart containers. 

The students will toss 2 small hearts into the ice cube trays.  The students will use the numbers to make a fact and then complete the fact family.  Students could also practice 3 addend addition!  Short and sweet- no pun intended! 


Tuesday, December 20, 2011

Money Sudoku

Hello Bloggers!  I'm sure you have all had a pretty hectic few weeks so I have a little Christmas gift for you...Money Sudoku!
I was at the NCTM conference in Atlantic City in October and saw the neatest money activity.  It was a sudoku game played with coins.  Besides the great logic, reasoning, and planning skills that emerge from this kind of puzzle activity, it is a great way to help young children identify coins.  Instead of buying the game, I thought I would make one myself. 
I created and laminated the board below.


Once the board is laminated, I used my hot glue gun to glue on some plastic coins in various places.  Then my board looked like this.


I made 6 different boards with varying degrees of difficulty. 


 I wrote a number at the bottom of the board to correspond with the envelopes (the gold 5 X 7 size) that held the coins necessary for solving the sudoku puzzle.  Mine look like those pictured below, but I made some cute labels for you to put on your envelopes.   See download below.


This is what a finished set looks like.  Your set will be better with the label.  To begin this activity I am enclosing the coins the students will need to complete the sudoku.  As they get better at this kind of brain teaser, you can make it more challenging by supplying more coins than necessary for solving. 

***IMPORTANT TIP- When gluing the coins on the laminated board, make sure you leave heads and tails showing to help students generalize the different sides of the coins!

It was a lot of fun making this game and I hope you enjoy it!  Have a wonderful, restful, well-deserved break!


Sunday, November 6, 2011

Sight Word Scrabble

I wanted to find a new way for my first graders to practice sight words.  They love solving word searches, so I thought they might like putting words together like in a scrabble game.  First things first, I used large craft sticks and wrote sight words on them.  I used sight words that we have been working on, but you could use any list you choose.


Then I created some labels for coffee cans to make it look scrabble-y and festive!


Of course, the craft sticks go in the cans.  The students take turns taking a stick, reading the word, and then writing it on the board.  If a word cannot be added, it is put back in the can.  I did not get a picture of the scrabble board I created to post here, however, I do have a downloadable for you! 

Download Sight Word Scrabble Board Here!

***The downloads have given me some trouble- click on refresh and that should do it!!


The kids have LOVED this, so give it a try and let me know what you think!

Bats and Facts!

Good grief!  Where does the time go?  Each time I sat down to blog I was sidetracked by something that would not wait!  Last weekend I was all set to settle in and blog away and then the snow began.  For those of you who are not on the north coast, the snow came to the tune of 22 inches here...the day before HALLOWEEN!  Can you believe that trick or treat had to be postponed?  The power outages were pretty wide spread, but all turned out well. 
We have been studying bats.  These fascinating creatures have been the focus of many projects we have completed in first grade.  I will post about our informational text soon, but today I would like to share with you our bat fact families!


We created our bats using construction paper, staples, googly eyes and a whole lot of love!  After we made them, each student was given three numbers to use to create a fact family.


The numbers the student had to work with are written on the bat's body.


The wings open so they look like they are flapping.  Inside one wing are the addition facts and the other wing has the subtraction facts.


The kiddos loved making these and they look adorable "flying" around the room!

Monday, October 3, 2011

Writer's Checklist

We are just beginning month two of first grade and I think things are going pretty well.   In a previous entry I mentioned that I use a gift box when I am introducing new tools to my students.  I grabbed an empty box from recycling.  I really scored because the box I grabbed was a copy paper box.  I found some fun gift wrap and wrapped the top and bottom separately so I could use it again and again.


Today's big reveal was our Writer's Checklist and a dry erase marker to use with it!  The students and I went over the checklist that they will use.  I explained that they will be responsible for checking these aspects of their writing before turning in their work. 


Each student will check their writing for uppercase letters at the beginning of each sentence, neatness, punctuation, and spelling word wall words correctly.  As they check each item on the checklist, they use their dry erase marker to put a check in the box.  As the year progresses our checklist will change and become more sophisticated to include staying on topic, commas in a series, interesting word choices, etc.  For now, I want to help students build good habits which include checking their own work and reading what they have written. 
Making the checklist was easy.  I found pencil accents at Dollar Tree (I bet you're surprised I was there!) and glued them on the checklists which were mounted on colored paper.  Last, they were laminated so they would last and the children could use a dry erase marker.  One swipe of a dry paper towel and the markings are gone! 
I have a few things in the works that I will post soon! 
Enjoy!